This is a summary of how I built a 6mm scale prototype forest with a removable canopy top in 6mm scale for second World War games, which might also work for 15mm scale infantry, possibly for War of 1812 games. The finished product is shown below.
 |
| Top half of photo shows Forest with removable canopy and base |
I decided just to make one forest to start with, figuring I would likely learn by my mistakes, and best to do that with one forest before going into "mass production" of 10 or more.
The first step in building this was to gather the materials I needed, luckily I had almost all of them on hand: Woodland Scenics dark green clumps, scatter flock, course flock, green foam board, wooden dowels, black gesso or primer, Crafter's Pick Super White glue, Scenic Cement and Aleenes Tacky glue.
 |
| Materials used. |
 |
| Strong Crafter's Super white glue to attach the trunks |
 |
| Tacky glue for the clumps |
 |
| Scenic Cement to spray seal everything |
 |
| Black Gesso |
These website was very helpful in providing instructions:
https://www.6mmacw.com/forests.html
The nest step was to cut out the canopy from 5mm thick foam board, I cut at about a 45 degree angle with and Exacto knife so the edges would be sloped to provide a downward sloping angle to allow the foliage to adhere better and look more natural.
 |
| Cutting out the top from foam board |
Next step was to prime the cut out canopy top in black, I used black Gesso as it is important not to have light colours showing through. I might have been able to use spray primer although I was concerned a solvent based spray might dissolve the Styrofoam. I left the underside the green colour of the foam board, I suppose it could be painted black also but I saw no reason to do so.
 |
| Primed with black Gesso |
Next I coated the canopy with Aleenes Tacky glue then started apply the dark green Woodland Scenics clumps.
 |
| Applying Clump Foliage |
 |
| Clump-Foliage |
I left it overnight to dry and had to do some touch-ups of the clumps.

Part of this project was to learn from my mistakes before I went to "mass production" and one mistake I made was not putting the trunks / legs in first as shown below from the website quoted above. Doing it after the foliage was applied meant the canopy did not sit evenly but more importantly it was difficult to tell how far the wooden dowels, I was using for trunks, penetrated into the canopy as they could go into the foliage thus it was time consuming to get all the trunks the same length so the forest would sit level. I ended up using a 3cm cut dowel to measure each dowel and move it to the correct length while the Super PVA glue was still wet. Another option for the future might be to use nails for the trunks applied through the top of the canopy, possibly cutting or filing the points off the ends. You have to be careful not to make the hole too large or you get wobbly trunks /legs.
 |
| Holes for trunks can be drilled or cut with a knife |
Before I inserted the trunks I stained them brown with Vallejo Wood stain and used Super white PVC glue to secure them. The trunks dowels were 35mm long, allowing for 5mm of penetration into the foam board. I opted to make the distance between the bottom of the trunks and the roof of the canopy 3cm high, enough clearance to fit all 6mm figures and most 15mm figures other than those with raised pikes, mounted or tanks.
 |
| Underside of canopy with trunks / legs attached |
 |
| The finished product drying |
Next I gave the foliage a heavy spray of Woodland Scenics cement to help seal it. I also added a small amount of light green scatter foam flock on top for highlights before the scenic cement dried. I let the scenic cement dry for 4+ hours.
 |
| Top of canopy with light green highlights |
Next I needed to make a floor base, at first I was going to make this out of MDF but decided in favour of the thinner easier to work with green felt or brown craft foam fabric as shown below. This I spray painted green and olive then flocked with coarse green flock.
 |
| Base before application of olive paint and flock |
The MDF base would be useful had I decided to mount the trunks in the base rather than in the canopy as shown below but this was not the method I chose as this method meant the trunks could get in the way of the figures moving and meant the canopy might be easy to accidentally knock off. However I may try one as an experiment in the future.
 |
| Not my forest, a different option |
Finished product shown in use in a 6mm Spearhead game below
 |
| Forest in use in a Spearhead game with base |
|
| Forest with removable canopy and base in background, old style forest in the foreground |
I may add some brush or small bushes using vine like flock (Woodland Scenics poly fiber or small clumps) to the edges of the bases to make it look more naturalistic, although this may make it difficult for bases of figures to fit or sit flat on the edge of the forest. I believe I used the poly-fiber on the heroics and Ros individual trees shown in the foreground of the above photo.
 |
| Poly-Fiber |
Another option for making these canopy woods is to use rubberized horse hair as shown below, then cover in it flock using coarse turf and spray glue.
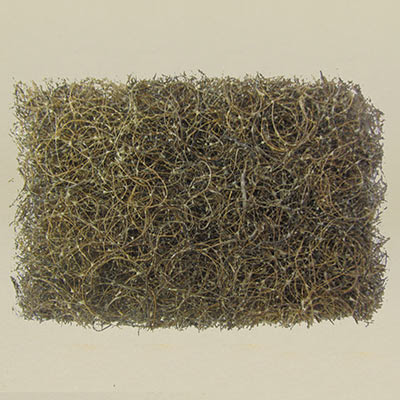 |
| Rubberized horsehair |
I have purchased some of the canopy forests made of horsehair from Terrain shed does, as shown below.
 |
| Terrain Shed Forest with German troops and AFV inside |
I also plan to make a few of my own canopy forests using rubberized horsehair. It is recommended that after flocking the rubberized horsehair with coarse turf (attached with spray glue) to seal it with hair spray or for a more permanent bond Plasti Dip flat Spray sealer, then a mat varnish if it is not flat enough. See these instructions:
"If you do go down that rout you will need a real good spray adhesive to attach the foliage and I would highly suggest using clear spray Plasti-Dip to seal it up. Otherwise the foliage will flake off. "
https://leadadventureforum.com/index.php?topic=111659.0

Also see this youtube video on using horsehair to make trees:
https://www.youtube.com/watch?v=5Ix9QXFmr8s
No comments:
Post a Comment